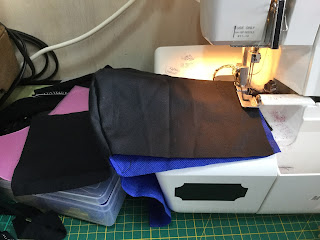
Luckily I have been trialling patterns this week, and did some batch cutting yesterday. The Craft Passion pattern is the most comfortable and is quick to sew, with no darts or ironing. I mean you could press the seams but I have neither the space nor time for that! What I do have is the overlocker set up on my cutting table ( not much room left for cutting though!) and the sewing machine over its little table, and a clear pathway between the two!
Pattern wise I realised when I printed the pattern it is slightly under the scale, but fits ok. I printed the mens size, which measures along the bottom at 13.5cm ( to fit me) and I enlarged the pattern ( by drawing around it with 2 pencils!) to be 14.5cm , which fits the tall 19 year old comfortably.
So my instruction for batch making masks are:
Cut out 3 layers. 1 outer 2 liner 3 inner ( the bit that touches your face)
I have been using either some weatherproof fabric for the outer ( a random Spotlight find years ago, knew it would come in handy for something! Catch is I only have pink or a dull orangey- red) with a liner and inner cut from old sheets.
Version 2 is cut from poly- cotton outer, liner from cut up shopping bags ( made from non-woven polypropylene / viscose), inner from poly cotton sheeting. Lucky I have a pile of second hand sheets I use for quilts, and pattern muslins!
Elastic or t shirt yarn (strips of t shirt fabric - which is more comfortable on the ears than elastic) is used to hold it on. I prefer 1 long piece about 65 cm, that goes around the back of the head twice. Can be worn over or under the ears.
Black= outer
blue= liner
grey-inner
 |
| 13.5 cm or 14.5cm across, handy that it randomly lines up with the 10cm mark on the cutting mat! |
If you want to include a removable piece of wire my method is to use a scrap of t shirt fabric or something that won't fray or require a hemmed edge. Sew a little rectangle ( drawn on to pattern above) onto each of the INNER pieces BEFORE sewing together/ Much easier than trying to sew a pocket into the 3D shape once it is sewn together. Use the gap in the centre to insert/remove wire for washing/ But I have found the mask sits ok on the face and doesn't really need the wire.
Sew curve edges together, I find it easier to start at the flat base side, otherwise the pointy bit can get stuck in the feed dogs of the machine. Sew each pair together.
Now I swap to the overlocker and overlock the edges for a neat finish and to save having to do a double hem later. Sew right sides out.
By overlocking the outer and liner together, I can then treat it as one piece and not get the wrong layers together, which I did on one of my practise ones! I had a slightly textured fabric for the liner but it ended up as the inner, and it tickles my nose to much. A nice smooth sheet is much better, or even something softer, might try some satin lining fabric, although it can be a bugger to sew as it frays like crazy...
Now there are 2 pieces to work with.
Pin or clip the 2 pieces together, right sides together. Sew TOP and BOTTOM but not the short sides.
Turn right sides out, I find a chopstick is handy.Hand roll the hems to make the edges neat ( quicker than ironing!) Nearly there!
This is where the overlocked sides are handy. Fold the edges in about 1cm on either side to make a casing for the elastic. Sew one side, then turn and top stitch the top or bottom edge ( depending on where you started!)
Done! Cut about 65 cm elastic, thread on a large needle or bodkin, in one loop through each side.


