Thursday 27 December 2018

Loki

I am sooo far behind with posts here! Here is the finished costume, complete with tesseract!

The tesseract is a plastic storage cube bought from kmart years ago, with a set of  reject shop battery operated led lights inside.
Black pleather op shop pants. T shirt top stretched a bit so will probably remake. Very happy with pieced pleather vest/ chest piece. Used some fabricy- foam material from Rathdown remnants ( pretty much all fabric purchased from there for this make!) to add just the right amount of " body" to the vest.


The cape is s straight rectangle of black lining cloth, lined with green, gathered at the top. Attaches to the back of the shirt with velcro.

Op shop belt was the perfect shape!
Shoulder paldrons made from painted yoga mat, shaped by  heating with an old hairdryer.
 Arm bracers made from painted. vinyl. Tried a lot of new techniques with this make. A lot of hours but a fun make!

Thursday 1 November 2018

More cosplay adventures

With 2 weeks' notice (and on the last day of the school holidays), the eldest finally decided what he wanted to wear for year 12 "muck up day". And along with making a costume for him, he asked me to make one for a mate too!
So it was time to do some research, taking lots of screenshots, drawing sketches, looking at YouTube, and then taking my ideas into Rathdown Remnants to find some fabric inspiration!

Saturday 29 September 2018

Vintage Sewing

Sorting through my sewing books recently I found 2 vintage 1950 "Women's Weekly"
magazines I bought from an op shop last year ( they were in a basket of old knitting patterns!).
I love this advertisement for a motor for a singer sewing machine

(and yes reading an old 1950 magazine is much more interesting than watching the football!)

Monday 24 September 2018

New look for an old chair

I found this chair at hard rubbish last year. I started sanding it months ago, then stopped. I finally had a proper go at it again today.
I cut a scrap of plywood to go on the seat (plywood also from hard rubbish).
The cushion was another hard rubbish find!
Fabric for the cushion was an op shop find.
Almost finished - looking much better with a layer of beeswax furniture polish! Still needs some more polish, and glue to tighten up all the joints.
But it looks so much better! Might be my new sewing chair I think!

Saturday 22 September 2018

Melbourne Yarn & Fibre Festival

So many beautiful yarns, so many colours!
I was very good and resisted buying any! ( but now I'm kind of wishing I had bought one skein I really liked - in the first photo)

Tuesday 4 September 2018

Making my "Outlander" costume

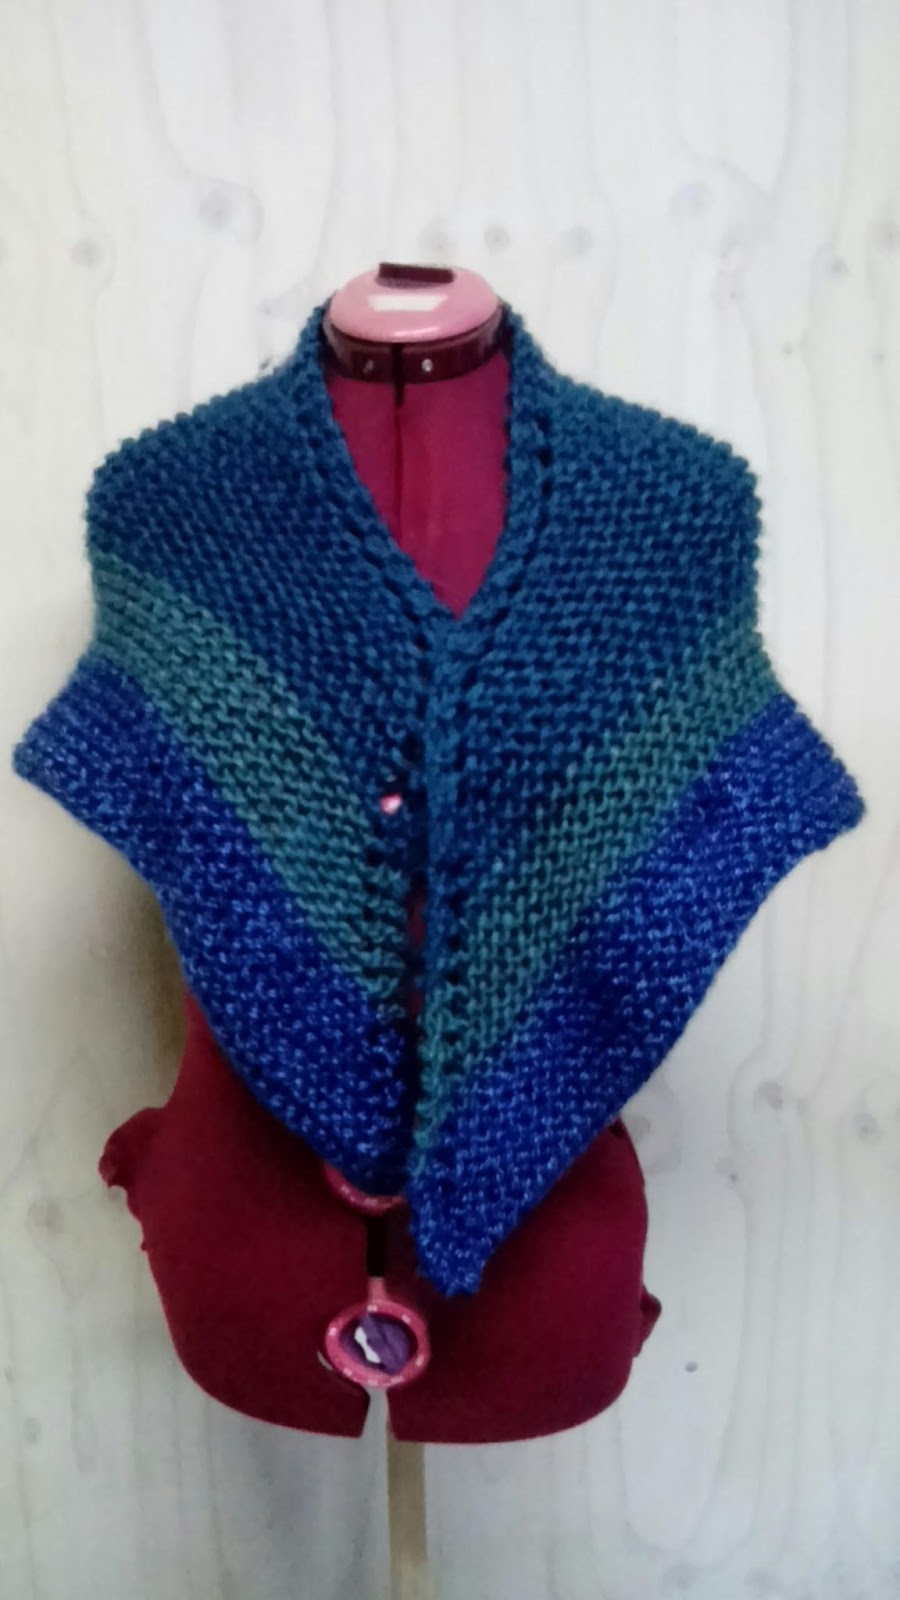
I finally got around to taking some photos of my Outlander costume - piece by piece. I knitted my armwarmers a while ago, and also had made a matching cowl, but knew I would be far too hot with it around my neck. Luckily I had treated myself to this gorgeous hand knitted shawl from the recent Spinners and Weavers show (I wear it all the time now and have finally started knitting one myself!)
The shirt is a New Look pattern 6042, I think might even be  the same pattern my Mum used to make an almost identical top for my wedding outfit nearly 20 years ago!
I added some hat elastic to the cuffs, and in the neckband in place of a drawstring.
The stomacher is made from a scrap of upholstery fabric with calico lining and another scrap of plain fabric on the back. The boning was an inspiration from my morning walk- I spotted some scraps of green plastic strapping tape (used to transport bricks or timber) at a building site. There just happened to be a length of it right on the fence line, so I took a piece home with me!
When I was trying it all on, I was worried the stomacher would not stay in place- specially if I sat down!
The solution was to add a couple of strips of elastic, connected with a 2 sets of large hooks and eyes.
The jacket is based on the Mollie Makes  sewing magazine " Zipped jacket" pattern, which I have made previously. I drew the front based on a RTW mediaeval lace up vest in my dress up box. I actually bought a $1 cardigan at the op shop first, cut it to shape then used it as a pattern.
I had a super lucky find at my local op shop- not only did I find a whole bag of silver buckles ( I had been searching everywhere for buckles for my son's Witcher outfit), there was a whole shelf full of bra making supplies ( but try as I might I couldn't think of an alternative creative use for several dozen bra underwires!). The wide satin elastic however was very handy, as was the strip of hook and eye tape - which was the perfect colour for my jacket, and much quicker - and less to figure out!-  than putting eyelets in.
The skirt was actually the first thing I made a few months earlier, when I found an end roll of about 3 metres of dark blue/ grey tartan/ plad fabric. I folded and pleated as I ran it through the machine, and added a waistband with casing for some elastic. It didn't have a lot of body due to fabric limitations, so I added a petticoat/ underskirt made from a $1 op shop summer dress- I chopped the top off and  added a waistband for a super quick make. I will make a bum roll before I wear it next.

Close up of the stomacher, thanks to lots of tips from the redshoesredwine blog for making the stomacher.
Phew! It was a lot of work - especially since I won the tickets to ComicCon and only had 11 days to make both my outfit and my son's. His was actually much more complicated, mine just took time because I actually made 2 different versions of my jacket before I was happy with it! 


Spring colour=yellow!

Lots of lovely, sunshiney yellow growing in our backyard at the moment- hello Springtime!!!

Wednesday 22 August 2018

Let there be light!

I saw some great sewing machine lights at the craft show, but thought they were a bit pricey. Plus one was battery operated, the other required a power point. 

I like the idea of some extra light, but would prefer something rechargeable. I thought I might find something suitable at Jaycar, and I finally got there for a look on Saturday. At first when I explained what I was looking for the guy in the store didn't think they had anything- other than battery charger or requiring a power point! But then he said " well we do have this, would it work?"

It is a small detachable light in a beanie (like a headlamp), about the size of a matchbox, but not very thick, and sooo light weight. You can see the size in the last photo, it fits in the 5cm square. 
I stuck a piece of sticky backed Velcro on my, sewing  machine  ( the soft side) and the matching ( prickly) bit to the light. Quick and easy on and off, and the light is do good I didn't even notice the next day when the globe went on the machine!!! ( Talk about perfect timing!)
It cost $20 and recharges in 4 hours in a USB charger, perfect! 

Wednesday 15 August 2018

Winter knitting projects

I have been knitting a couple of quick projects lately, with more planned after looking up patterns on Ravelry!
Inspired by " Outlander" and some wonderful creations seen on the "Outlander inspired Costumes" facebook group (  which of course I had to join!)
My First attempt was a very basic garter stitch shawl, starting with 3 stitches, then adding a yarn over after the first knit stitch and again before the last stitch of each row. It made a big long triangle, and it is perfect for keeping my shoulders warm when reading in bed!


The second shawl was knitted using the "scrappy shawl pattern" found via Ravelry. I am fascinated by how adding 2 yarn overs in the middle of each row totally changes the shape.
With the first shawl, you start at the " pointy end" of the triangle and finish at the opposite long side, but with the second even though you start off with only 5 stitches, you are actually knitting the long side and the shaping means you end up at the pointy end! Which is kind of why I had to make one, just to get my head around the pattern - even though it is very basic, but the way it works is very clever!
This one is nice and warm, and can be worn as a bulky scarf. Turns out shawls are a great way to use up left over yarn ( hence the scrappy shawl pattern, there are some great colour combos shown there, using up lots of oddments).  I think I used 4 or 5 colours in the first one ( 2 strands knitted together all the way through), and the blue/ green triangle finished off 3 oddment balls of bulky yarn! 

Monday 6 August 2018

Strip and flip quilt

I saw a post from 2012 on a blog called " cluckclucksew" when I was looking for quick quilt ideas. This one is not exactly the same ( mine is even more basic!), but uses the idea of  sewing lots of strips together, then trimming a section from the right hand side, flipping it end to end, then sewing  it back on with a  contrast strip in between.


Sewn up in 2 days ( late nights and early mornings!) for a special birthday.


Sunday 15 July 2018

Duck duck goose!


Apologies for the long gaps between posts lately, blogger is playing up, I write a post but when I publish it I only get the photos, and maybe the first sentence. So having to try starting the post on my phone- because that's where my photos are, then publishing the half done post, and finishing the writing on my tablet. Tedious!
Anyway, here goes my  4th attempt at writing this! 

Photos from our recent visit to the Melbourne Alpaca and Poultry Show. The former poultry building at the Royal Melbourne Showgrounds is now the Masterchef studio, so the ducks, geese and chooks don't have a spot at the show in September anymore, and instead have their own show ( well, shared with the alpacas, who apparently aren't so keen on their noisy neighbours!) in July. 
We even came home with a free show bag- full of samples of different chookfood!


There were birds of all shapes and sizes, such as Indian runner ducks-
Lovely specked hens ( Wyandotte I think)
A duck impersonating a seagull...
Turkeys are certainly the largest birds on show, but not necessarily the most attractive- unless you are another turkey of course!
However, close up their plumage is actually rather gorgeous!
This sweet little hen was busy making a nest in her pen, carefully selecting just the right pieces of wood shavings for a tidy little nest.