Friday 31 December 2021

A fond farewell

 We have been going to the local butcher - a 5 minute walk away - for the last 16 years since it reopened. Today the doors have closed for  the last time, as Frank has decided it is time to retire. He is quite a local character, knows his regulars by first name and is always up for a chat. 

When I found out he was closing I put a post on the local Coburg Good Karma Facebook page, to let people know and to ask if people could maybe drop in and say goodbye. Luckily I had checked today because Frank’s daughter in law posted that he was closing an hour earlier than planned, so I quickly ducked down to the shop to say goodbye. I had sewn up a couple of strings of blue striped bunting yesterday ( thanks to Helen from craft group years ago, who showed me how to whip up bunting on the overlocker!) so I hung that out the front between a parking sign & power pole! 

Frank already had a few family members and local loyal customers out front;  and a few more dropped  by to say goodbye. He was very chuffed with the send off and loved the picture I drew for him of the shop. I was pretty happy with it myself, especially considering I only decided to do it about 10pm last night! All done with my alcohol markers, fine liner outline & white gel pen for highlights; copied from a photo I took earlier in the week.


Tuesday 21 December 2021

Daiso delights!


 Popped into Daiso on the weekend while attempting some Christmas shopping…I had to replace my favourite drink bottle that I broke when the wind blew it off a table & onto the concrete! 

 I figured while I was I the shop I would have a quick look at the craft section - so glad I did because look what I found, 2 sashiko stencils! There were only these 2 but it looks like there are other designs available, will have to keep looking. Very happy with the Yabane ( arrow feathers) design, I drew it by hand for my Death Star project & have been wanting to use this design again - will be much easier with a stencil now!

Case sensitive

 I spotted a child sized vintage suitcase in our local hard rubbish rescue fb group a little while back, & was lucky to collect it. I remember having a similar mini suitcase as a child, it was my kinder/ prep case! Would have used it to carry a drink bottle of frozen cordial, with a cup on top, wrapped in a towel to keep it cool!

This little case was a bit bigger than my original, made of cardboard but with metal locks and plastic covered corners.


I removed some of the loose stickers, gave it all a light sanding, and masked all the trims with tape. Then I gave it a good coat of gesso for a base coat.


I kept a “window”on the back  to show the original label. I mixed a couple of shades to get a nice dark red & did 2 finishing coats, then a coat of low sheen varnish to seal it all.


Very pleased with the results, came up looking more like leather than cardboard! It was a fun project, & filled with some fabric & threads it made a lovely birthday gift! 


Friday 19 November 2021

Sashiko Happy!

 I ordered some new sashiko stencils a few weeks ago. The first two arrived in about a week, the rest arrived today! I can’t wait to sit down and plan out some new creations.


Dragonflies and fishing net, in 2 different sizes.

Flowers, mini patterns, and a corner design.
There are also two sets of shapes - a set of circles and a set of hexagons.
They are clear acrylic, I just  have not peeled off the brown paper covers yet.
 The circles and hexagons will come in handy for a range of projects I’m sure.


Tuesday 2 November 2021

Sashiko design

 I have a half- stitched sashiko that has been sitting here untouched for weeks, really must get back to it! I did design & trace a new sashiko today, but it is for my friend Fiona who requested a pattern for her Mum. Fiona bought a couple of printed panels at GJ’s on our visit there earlier in the year; she gave one to her mum who enjoyed stitching it and requested another one! So I got my stencils & ruler grid out & drew this up. I also added a few fabric shops and sashiko stores to the “other things to read” list over on the right.

The other thing I did today was finally finish removing half a zillion tiny beads from a lovely op shop shirt  ( another half done craft project that has been sitting around for a while!).It looks so much better without all those beads marring the pin tucks. Turns out it is some fancy Italian brand that retails for 300+ euro per shirt - which apparently is about $450! Seriously?!? I can only hope that means it was hand made and the machinist who made it was paid decently! I only paid about $5 for it.


Friday 29 October 2021

Waratah


Photo inspiration- enlargement of section of photo, taken from a screen shot of a floral arrangement from a lovely local florist “ Art of Nature”. Brand new shop opened last year, by very talented florist Mel, who  is the parent of one of my former students!

Sketch from photo on iPad -trying my new Kraft brown paper.


Nearly there!

Done! I think… added a bit of extra colour and filled in the background a bit more with some coloured pencil.


Sunday 17 October 2021

Purple!

 I wanted to try a blue or purple flower for today, inspiration from Vireya again! Hope you don’t mind, but you have so many fantastic flower photos!

 I still need to do some more work on the flower centre, and add in some leaves for contrast & background. Need to let it all dry out really well before going back in now. But happy with the layered colours so far! Ordinary sketchbook paper today.I have ordered a couple more markers, and a pad of Kraft paper, will be interesting to see how the markers go on the different paper & with the non- white background.

 I found a great free app called “Marker Match” which makes it much more easy to keep a list of which colours I have, and compare the colours of other markers on sale. I have found the “Touch New” brand has the same numbers & names as my Graphic Pro Duo and Mont  Marte markers. The little colour square in the app is way more accurate than looking at the colour on the lid!


Saturday 16 October 2021

Poppy Posy


 I saw these lovely poppies in a garden on a recent walk. I spent a while trying to draw & colour them yesterday, but was not happy with the result. I used a sheet from a Monte Marte Jumbo drawing pad with 95gsm paper, but I felt the colour were just too dull and flat. I couldn’t get the same lovely depth of colour that I get on other paper. I persevered because I figure it is all good practice! Interesting that different papers produce such different results.

I had started with only the briefest of pencil sketch outline, just some circles to place the poppies, then sketched the flowers with a pale grey marker before outlining in red or pink, then layering more colour. I wanted to try something different by filling in the background with colour, to fill the page a bit more & make the flowers pop a bit more, but it still looked dull. 

After a bit more research - reading online & watching some more marker YouTube tutorials, I got up this morning & thought “ what if I outline everything in black fine liner?”.

So I did, and am soooo much happier with the result now! The poppies definitely “ pop” a bit more now!


Monday 11 October 2021

Latest drawing…

 Just popping in for a quick update - here is my latest drawing. Quite unplanned, I went into the study last night to print a recipe I had found online ( chocolate chip cookie dough bites, found via Frankie magazine website- will let you know what they are like if I make them next weekend!). I saw my markers on the desk & thought “ I must pack this up before work tomorrow, but maybe I’ll just check though some photos on the iPad for ideas…”.

And so I sketched this …and then I coloured it in!

Huge shoutout and thanks you to Vireya who takes such superb photos of her amazing garden, and posts them on her blog. I took some screen shots recently and used this one as inspiration, a  dahlia from a post on April 15. And there are plenty more flowers there I plan on trying!


I don’t have a lot of yellow shades, but I am very happy with the leaves! I sketched the flower very lightly on the paper then rubbed most of it out til I could only just see the outlines, but did the leaves freehand with the markers. I only have 60 something markers, and unfortunately the starter kit I bought had a lot of grey ones, so I have had to add in some extra colours here & there. Hmmm, maybe I should try to recreate a black and white picture & use all the grey markers!


Saturday 9 October 2021

Making a mark

 I borrowed a box of alcohol markers  from a friend a few weeks ago, to colour in some black & white picture cards for work. We don’t have a colour printer, and figured  black & white pictures would not be very appealing/ engaging for my students during my online teaching sessions! 

I had a lot of fun colouring lots of little pictures ( about 8 cards to an A4 page, which I then cut & laminated into individual cards). In fact I had so much fun I started looking online for some not too expensive / but not too crap quality markers for myself!

I have bought a range of different art & craft supplies from Riot Art over the years, and although there was only one online review for their markers, it was very positive - and they had a good sale on! I would have bought some from Daiso, because their markers have had great reviews;  but for some unknown reason they don’t have an online store in Australia. Officeworks had very little info - hard to tell what colours were in their sets, and really their website/ search is a bit rubbish. Cotton On/ Typo had some super bargains but lots of bad reviews for their markers. 

So I put in an order with Riot Art for a set of markers, plus a few extra individual colours ( I mean they were on sale for 99c and $1.99, so hard to resist!). Of course I had sent my order off just as there were huge delays with Australia Post - at one point I got a notification that my parcel had gone from Melb, to Qld, and was now sitting frustratingly only 20 minutes up the road at the Sommerton Road dept ( but outside of my then 5km limit!). 

It arrived eventually ( think it took 2 1/2 weeks!) and there was only 1 of the 99c single colours not in stock. 


I had fun trying out the colours, experimenting with layering and blending ( watched a lot of YouTube for research!)  and made a swatch/sample sheet of my colours. Then I remembered Monte Marte art supplies, and ordered a couple of extra colours to fill in the gaps - mainly greens, yellow, brown I think. The staff at  Moorabbin Art Shed were very helpful over the phone, and my order arrived in a few days.

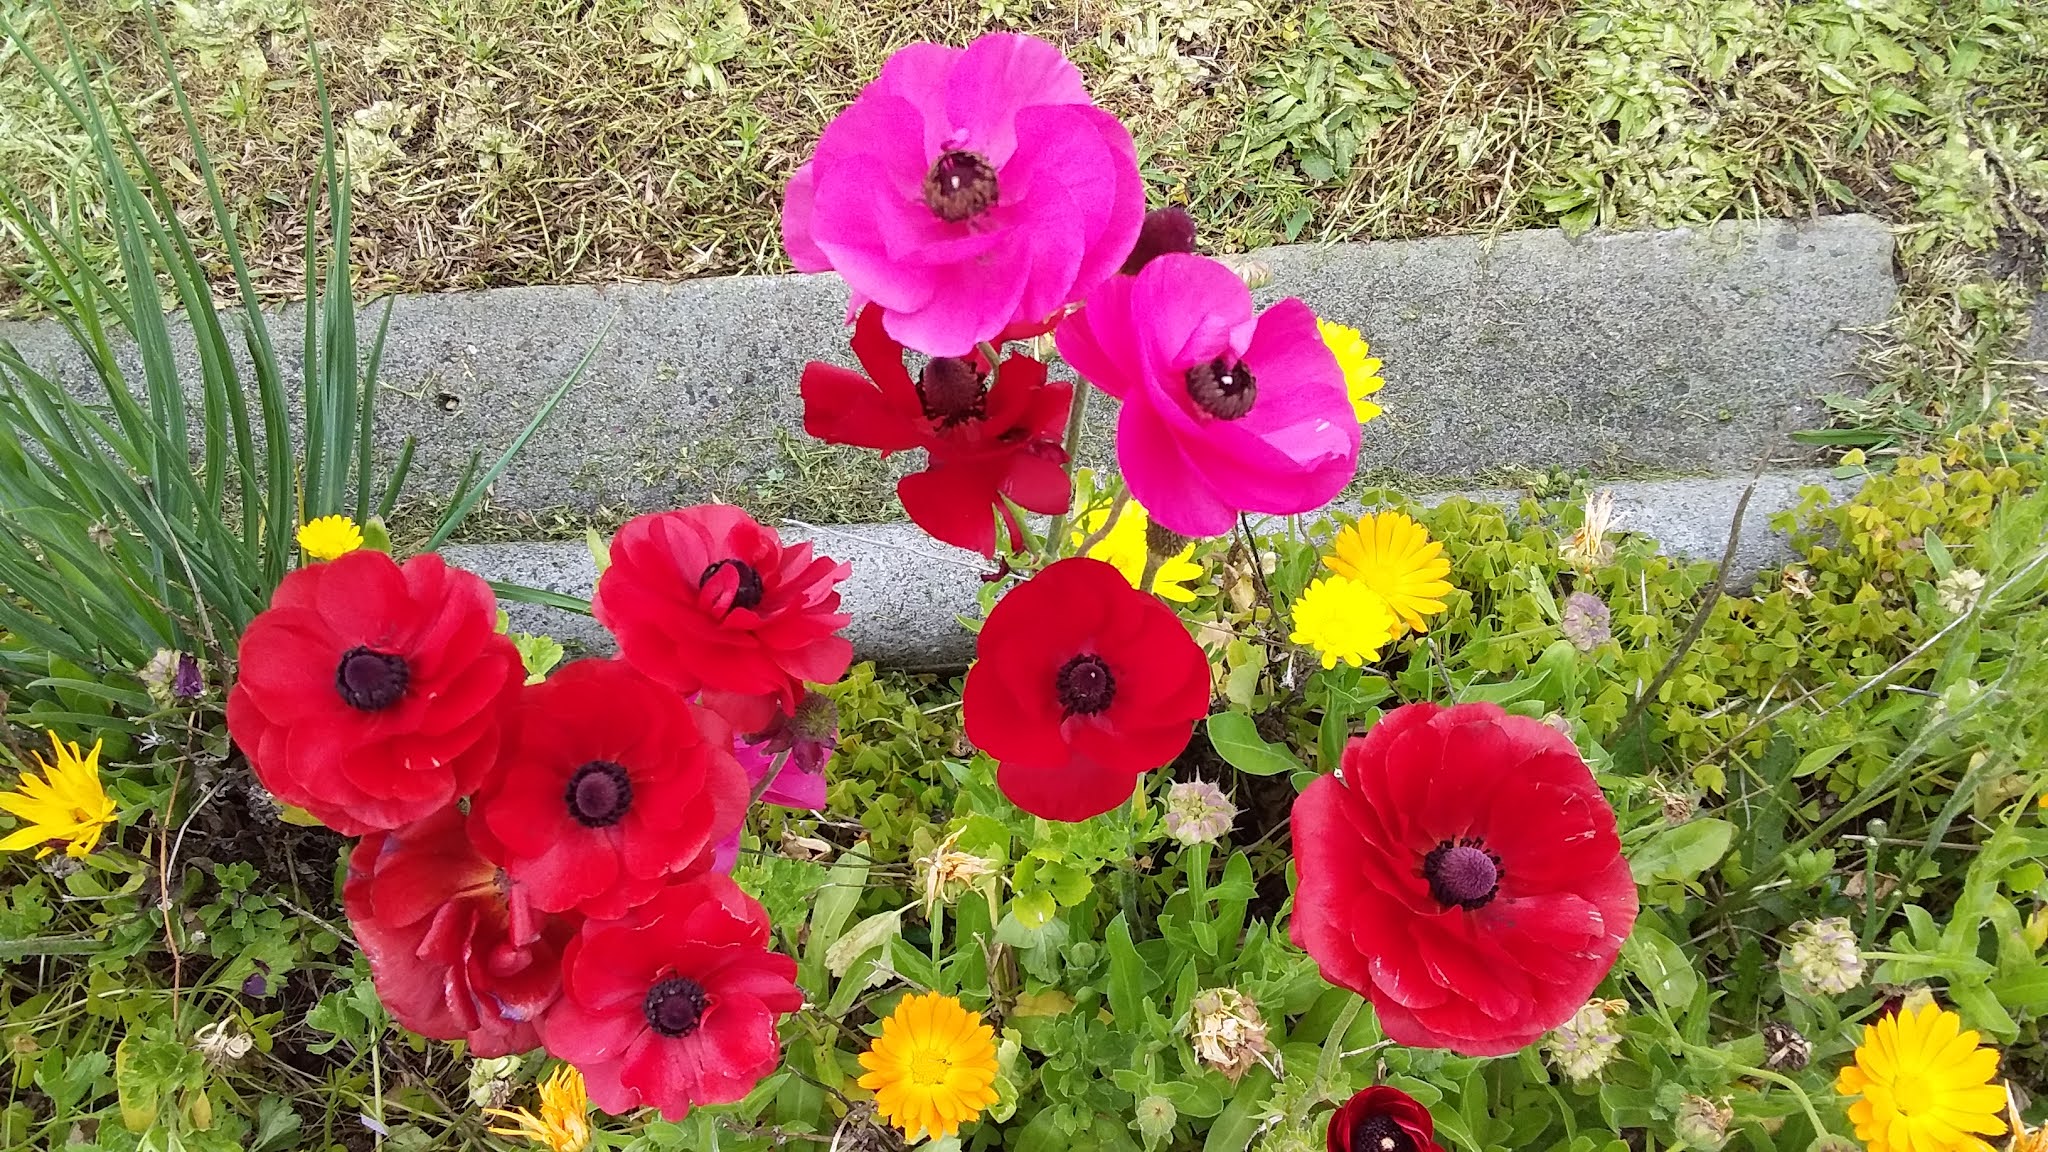
I have been experimenting with different colours, and different papers too. First I found a photo I liked ( I have been admiring the neighbourhood flowers when out walking The Dog). After playing around with a free photo to sketch app, I printed the photo on regular copy paper & tried colouring it in.

Original photo

Photo sketch on copy paper

Photo sketch printed, then traced onto cheap sketchbook paper using the light box.

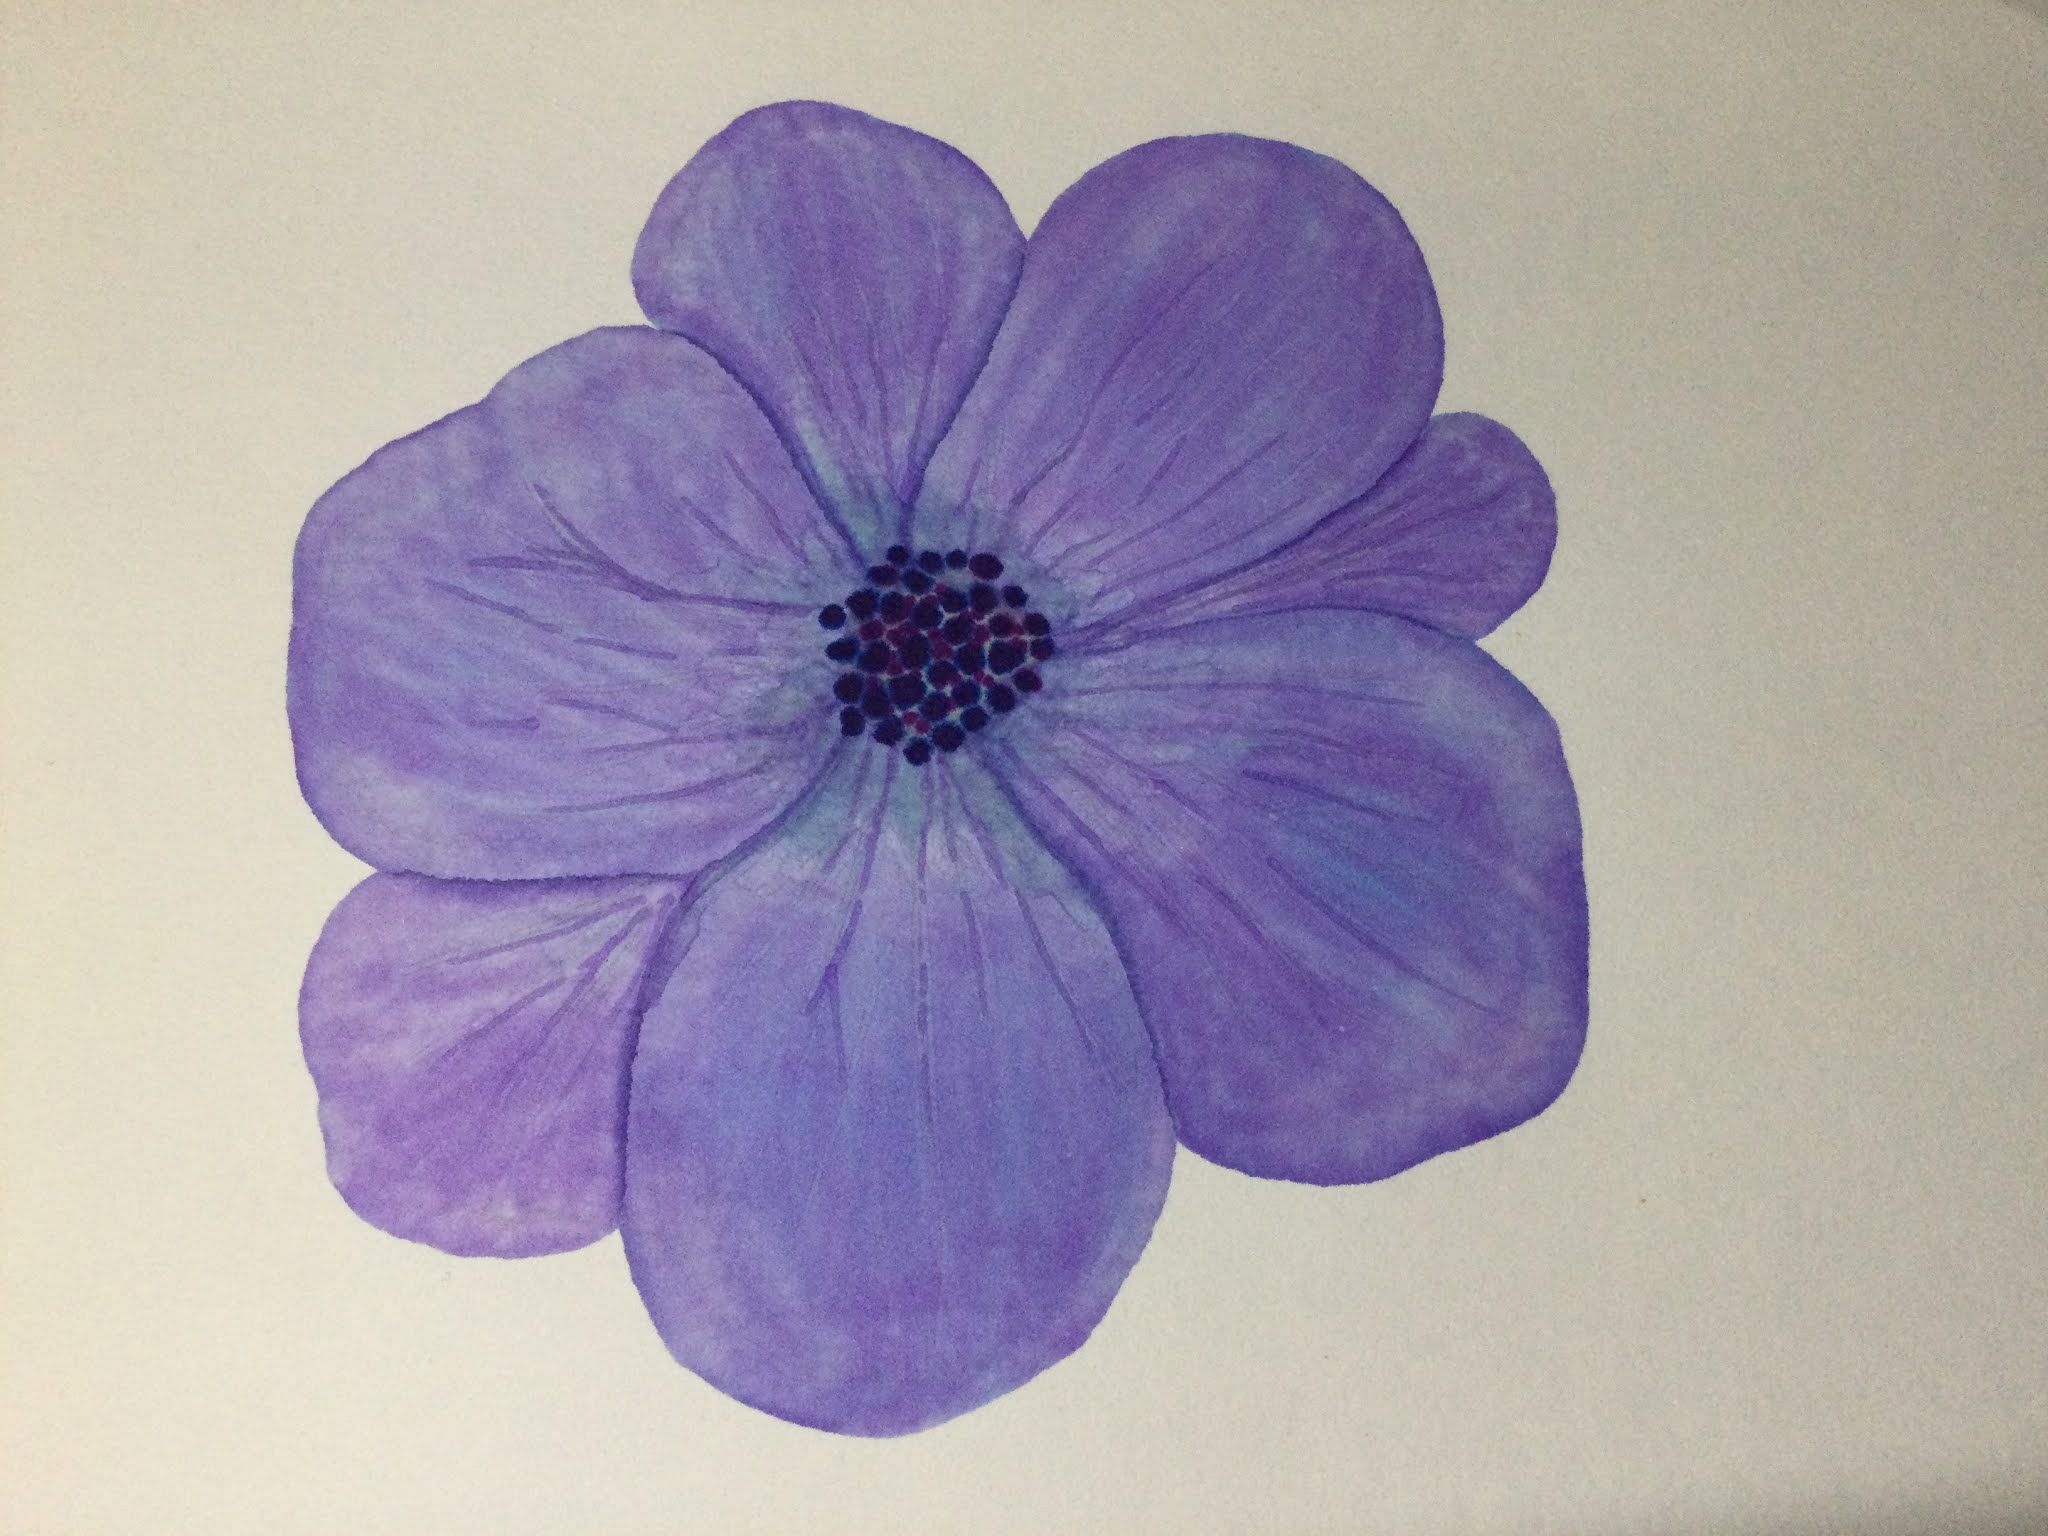
Today I found a photo, sketched a flower freehand from the photo, then coloured on water colour paper. Quite happy with the results, I will keep practicing, lots of fun so far!


Wednesday 29 September 2021

New threads!

I have been wanting to try some new sashiko patterns, and ordered a new set of stencils a few weeks ago. I traced off the Asanoha pattern and started stitching it in grey, but decided I really wanted a variegated green thread. 
After some searching online looking for some Sue Spargo Wonderfil threads, I ended up phoning Mill Rose cottage and ordering some new threads. My package arrived last week!
Look at these lovely colours -
I had noted down a couple of colours I liked, but found so many on line - some had numbers, some had names. The staff member at Mill Rose explained that there are new colours released every year, hence such a huge range. I described the colours I wanted, and they had 3, but I ended up having to put my faith in my description & the staff member's choice for me! Luckily they are all pretty much what I had in mind. Will have to trace off some new designs once I finish my current project. The variegated green is just right. 

Saturday 18 September 2021

Time to put my feet up

I found a footstool at hard rubbish a couple of years ago and always meant to get around to giving it a make over. Last weekend I was looking for a quick craft project & decided on the footstool. Plus there have  been times when I need to put my legs up after a big walk with The Dog - but my H is using the footstool ( another HR rescue from a few years ago). 
I still have a box of upholstery scraps purchased from Rathdown Fabrics ages and ages back. I used some of thoses pieces, plus some vintage sample pieces gifted to me by my H's grandmother  years ago.
I didn't take many " before" pics, suffice to say it was dusty and stained from having lived on the verandah for a couple of years. I ripped the cover off but left the under layer of fabric. There were abour 350 staples in the timber frame. I removed the ones on the sides but decided life was too short to be bothered with the ones underneath!
I simply hemmed a piece of calico and hot- glued it to cover the base & hide all those rusted staples!

The cover is simply slipped on with a calico casing holding  some elastic, so it can be taken off to wash. 
Too easy!

Monday 23 August 2021

Birthday quilt projects

I have made 3 birthday quilts in the last few months, but due to lockdown I have not been able to deliver any of them yet! And just in case the intended recipients check in on the blog, I can't post any photos of the first two quilts! 
But I should be ok posting the most recent one, which hopefully I will be delivering after work tomorrow. 
On Saturday my friends daughter  turned 18. On Friday I decided to make her a quilt! I looked through some books- and my stash!- for ideas  and worked out a design. Saturday I sewed up the front and back pieces, and Sunday I pinned and quilted it. All fabrics from The Stash - I have a box of rainbow strips from the first few quilts I made, I must have cut out heaps of strips!  Even the binding was 3 lots of leftover pieces, there was just enough to go around,  with only about 30 cm left over.
Today I managed to duck outside just before the rain started, and took a couple of photos. Of course The Dog had to check it out, as you can see in some of the photos!

Thursday 12 August 2021

Comic Con can wait


 It was suggested this week that maybe we have some fun in our online team meetings/check-ins at work. So I thought I would get the ball rolling by dressing up as General Leia Organa ( The Force Awakens) for our lunch time check-in today ! I had actually made this for Comic Con months ago (it has been postponed of course!), all I had to do to finish it off was make the belt buckle last night ( craft foam, craft wire & silver paint), and watch a YouTube clip on how to do my hair ( which took about 15 minutes and a whole lot of bobby  pins!).

The boots and belt were op shop finds, as was the jacket - it was the exact shade of purple I was after and had not actually been able to find the right colour and weight of fabric anyway! From memory it was about $4, and I unpicked the sleeves to run it into the vest.

Jacket and pants - because seriously a jumpsuit is just too impractical, not to mention too cold in this weather! - are made from the same pattern as my orange Rebel Pilot outfit, and like that costume the fabric came from Super Cheap. The orange was bought when the Roxburgh Park store was closing down, and this sagey-greenish fabric was bought when the Brunswick store was closing! Pretty sure it was only a couple of dollars a metre each time ( still have heaps of the sage left too). The main differences are the wide collar on this one, no extra pockets ( although I put proper side pockets on the pants, because…pockets! 

Oh and I had my official Leia ring on, Christmas gift from my son a few years ago - so of course I had to eventually make this outfit to match the ring!

Saturday 31 July 2021

Fun weekend project - op shop skirt makeover

I went to Spotlight yesterday but on the way noticed that the Helping Hands op shop just across the street was open. So of course I had to make a detour...
I found a couple of cute solid colour shirts, a lovely black boiled wool jacket ( so lightweight!), and a cute long skirt. 
The skirt was super long, and quite skinny, but had potential!
As you can see the skirt was floor length, and too small around the waist for Edna! 
I unpicked & removed the zip, then chopped about 25 cm off the top of the skirt. I used the chopped of part - complete with waistband- to cut & sew 2 patch pockets. A scrap of lycra worked for the  new waistband ( like a waistband on leggings).
Ta dah! 50's style skirt, and the pockets are perfect - big enough for mask, glasses, phone and wallet!And there was a scrap of fabric left big enough to make a matching hair ribbon! 

Saturday 24 July 2021

quick project 2 sashiko mask

So I thought I would show my love of sashiko by sewing and decorating a mask! I drew & stitched the design, then sewed up the mask. 
I had soaked & washed the indigo fabric already BUT  not enough it seems! when I got back home after I wore the mask to the shops, I noticed a blue smudge on both my cheeks - where the front indigo fabric is folded to the inside to make the chanel for the lycra ear loops! ( the lining layer is cotton sheeting) 
Damn! will have to tweak it a bit before I can wear it again!

Catch up - quick projects 1 - vest make over

Looking through the photos on my phone I am very behind in posting!
First up is a vest I bought from an op shop ages ago. I like the colour and fabric, but it was just not quite right. 
I finally figured out the high neckline was the issue, as well as the length; so I shortened the vest & recut the front neckline. It is an 

intersting mix of tapestry type fabric & a thick woolly fabric ( so it is actually quite warm to wear!).
It is a bit quirky & a nice layering piece...so I have now dug out a vest pattern & cut some fabric out to make one from scratch!